Would you like to know how to upload pdfs to Seesaw and make them interactive? Here is a quick tutorial for you! Watch the tutorial or/and read the blog post with the details.
You probably have tons of teaching resources that you created yourself or bought on TPT. And you can reuse these printables in Seesaw!
Step 1 - take a screenshot
Simply take a screenshot of a pdf file you have. You can also upload the whole pdf file but it should have up to 20 pages (if you need to "delete" unnecessary pages, you'll have to split the pdf).
It is important to follow the terms of use of a resource that you have purchased.
How to take a screenshot
- Mac users – Command+Shift+4 allows you to select what you want to take an image of.
- PC users – Alt+PrntScn will take a screenshot of your screen or try the snipping tool by clicking Windows key+Shift+S.
Step 2 - save the screenshot on your computer
Save the screenshot in the folder that you can easily find on your computer.
Step 3 - upload to Seesaw
Go to Seesaw, click on plus sign and create a new activity. You can name it and add student's instructions.
Choose add a template, then click upload and choose the screenshot(s) you saved before from your computer.
Step 4 - make the file interactive in Seesaw
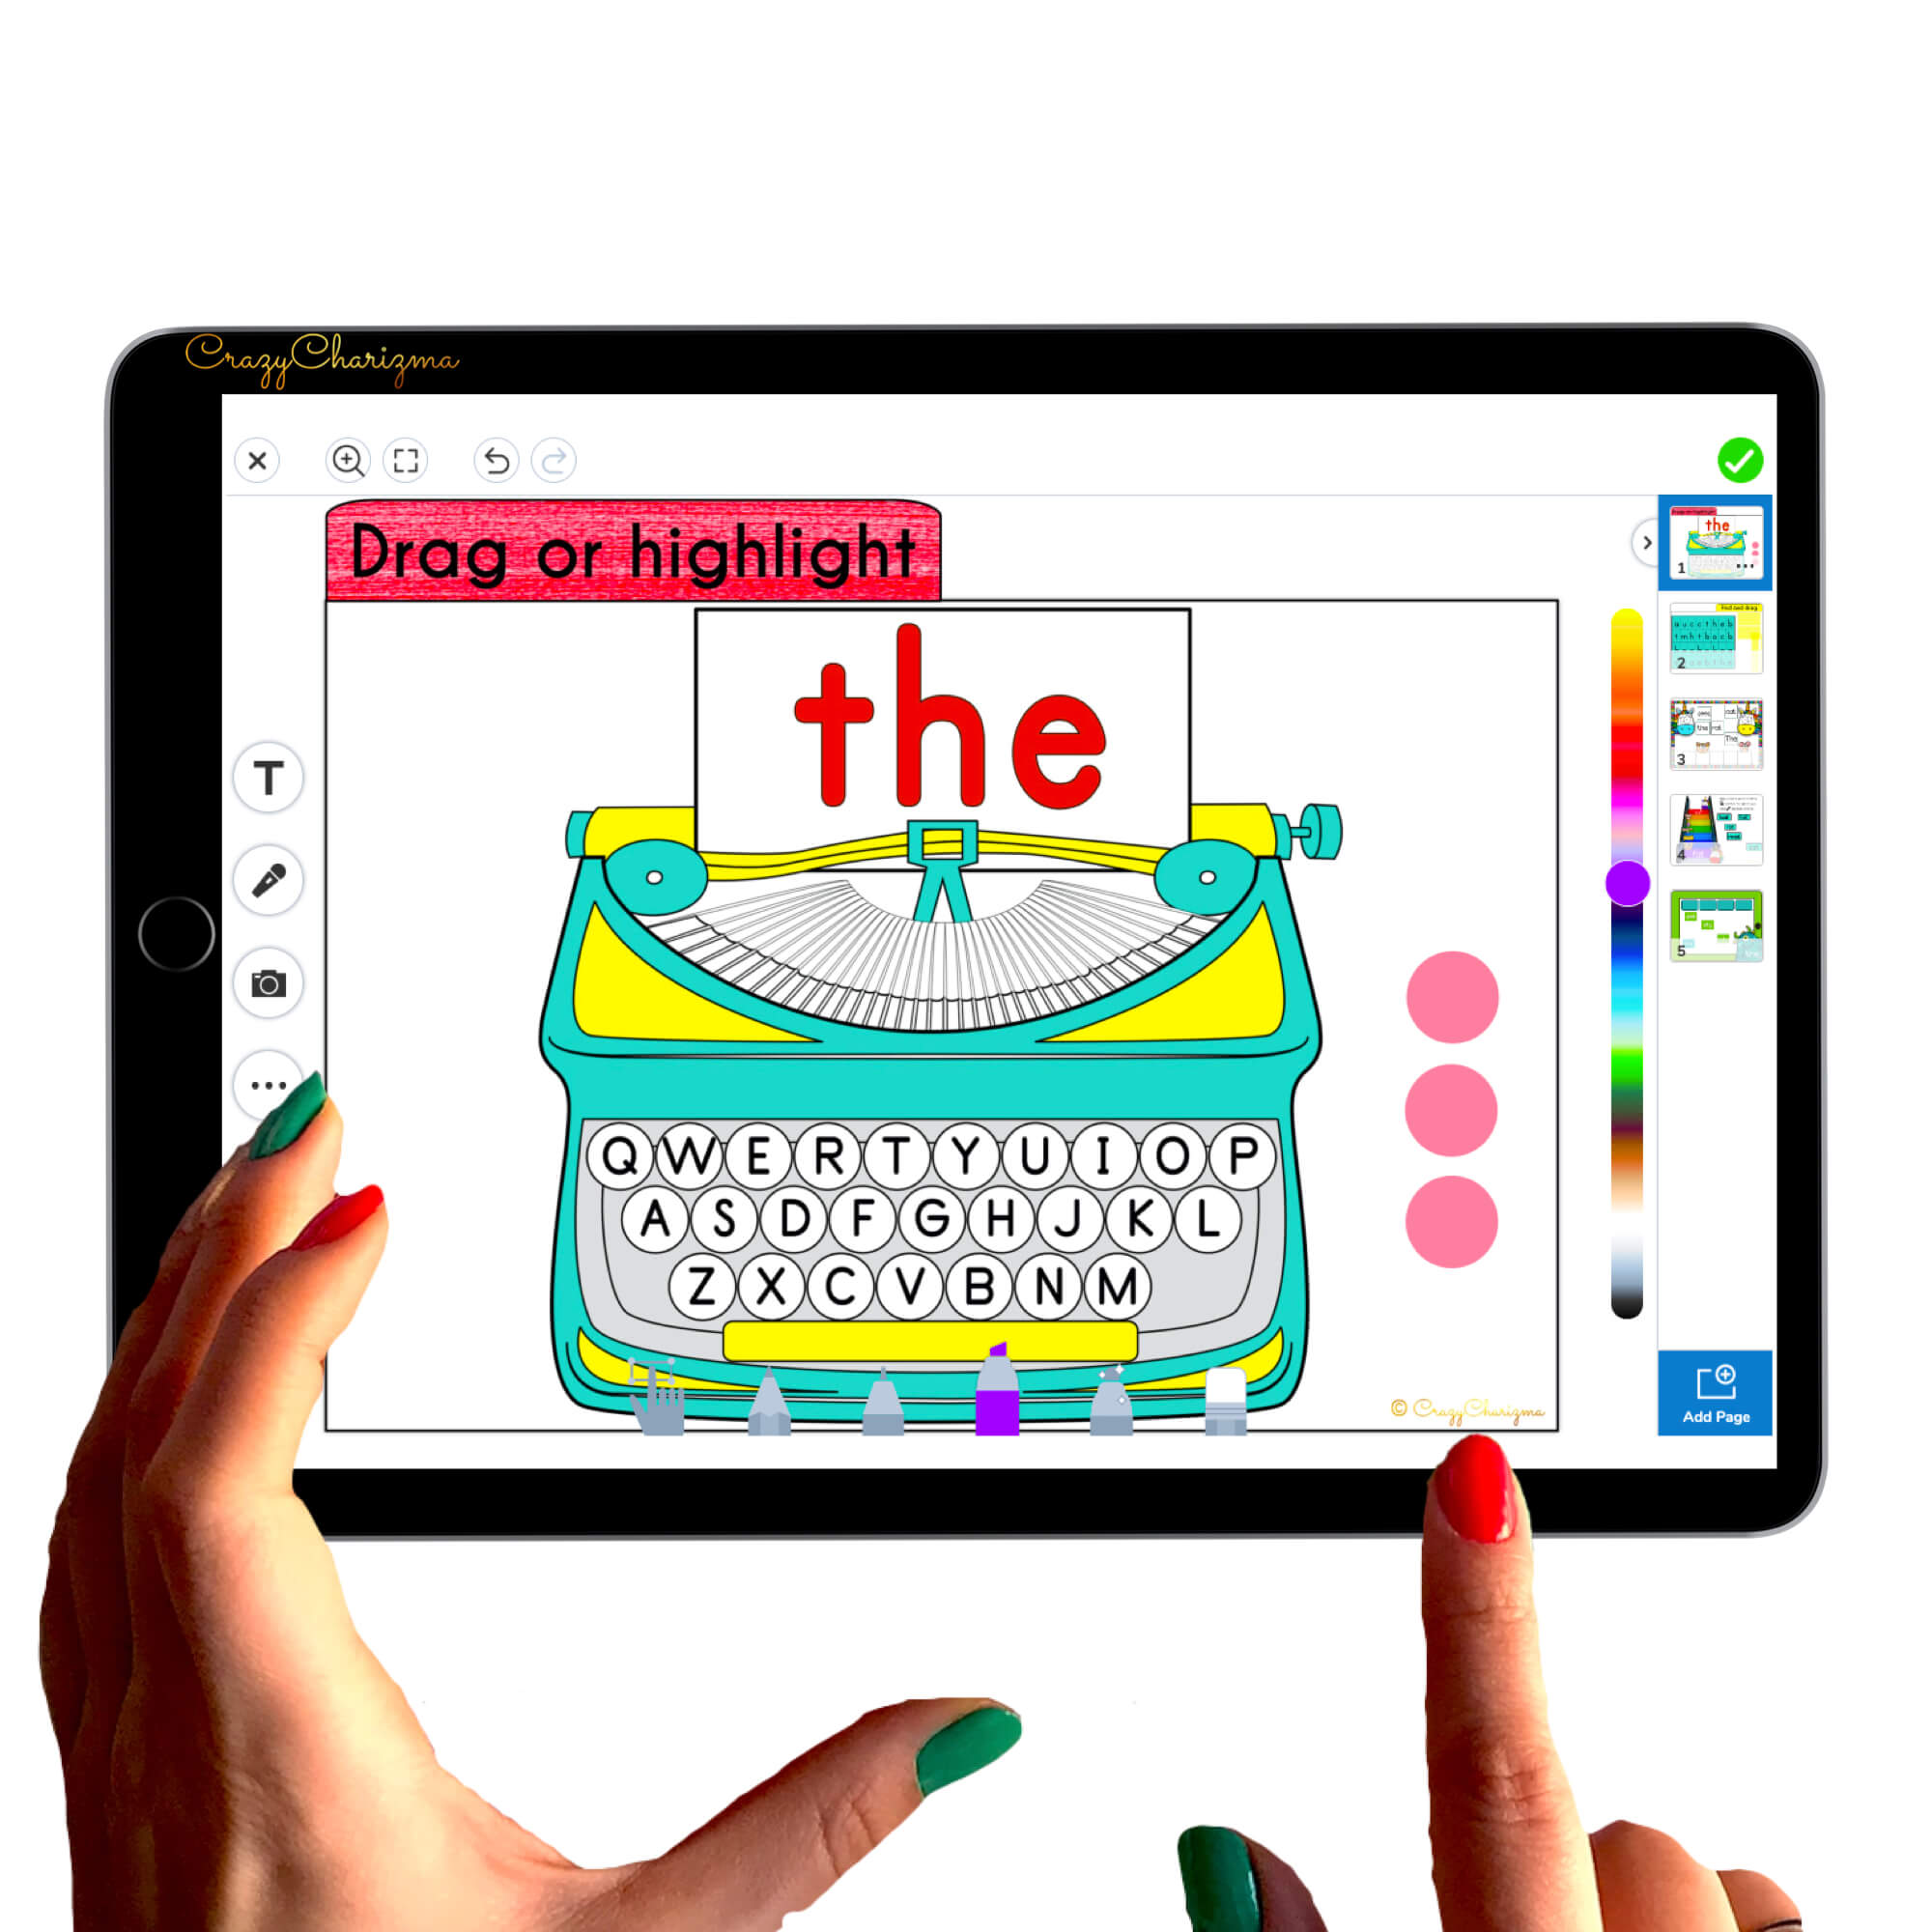
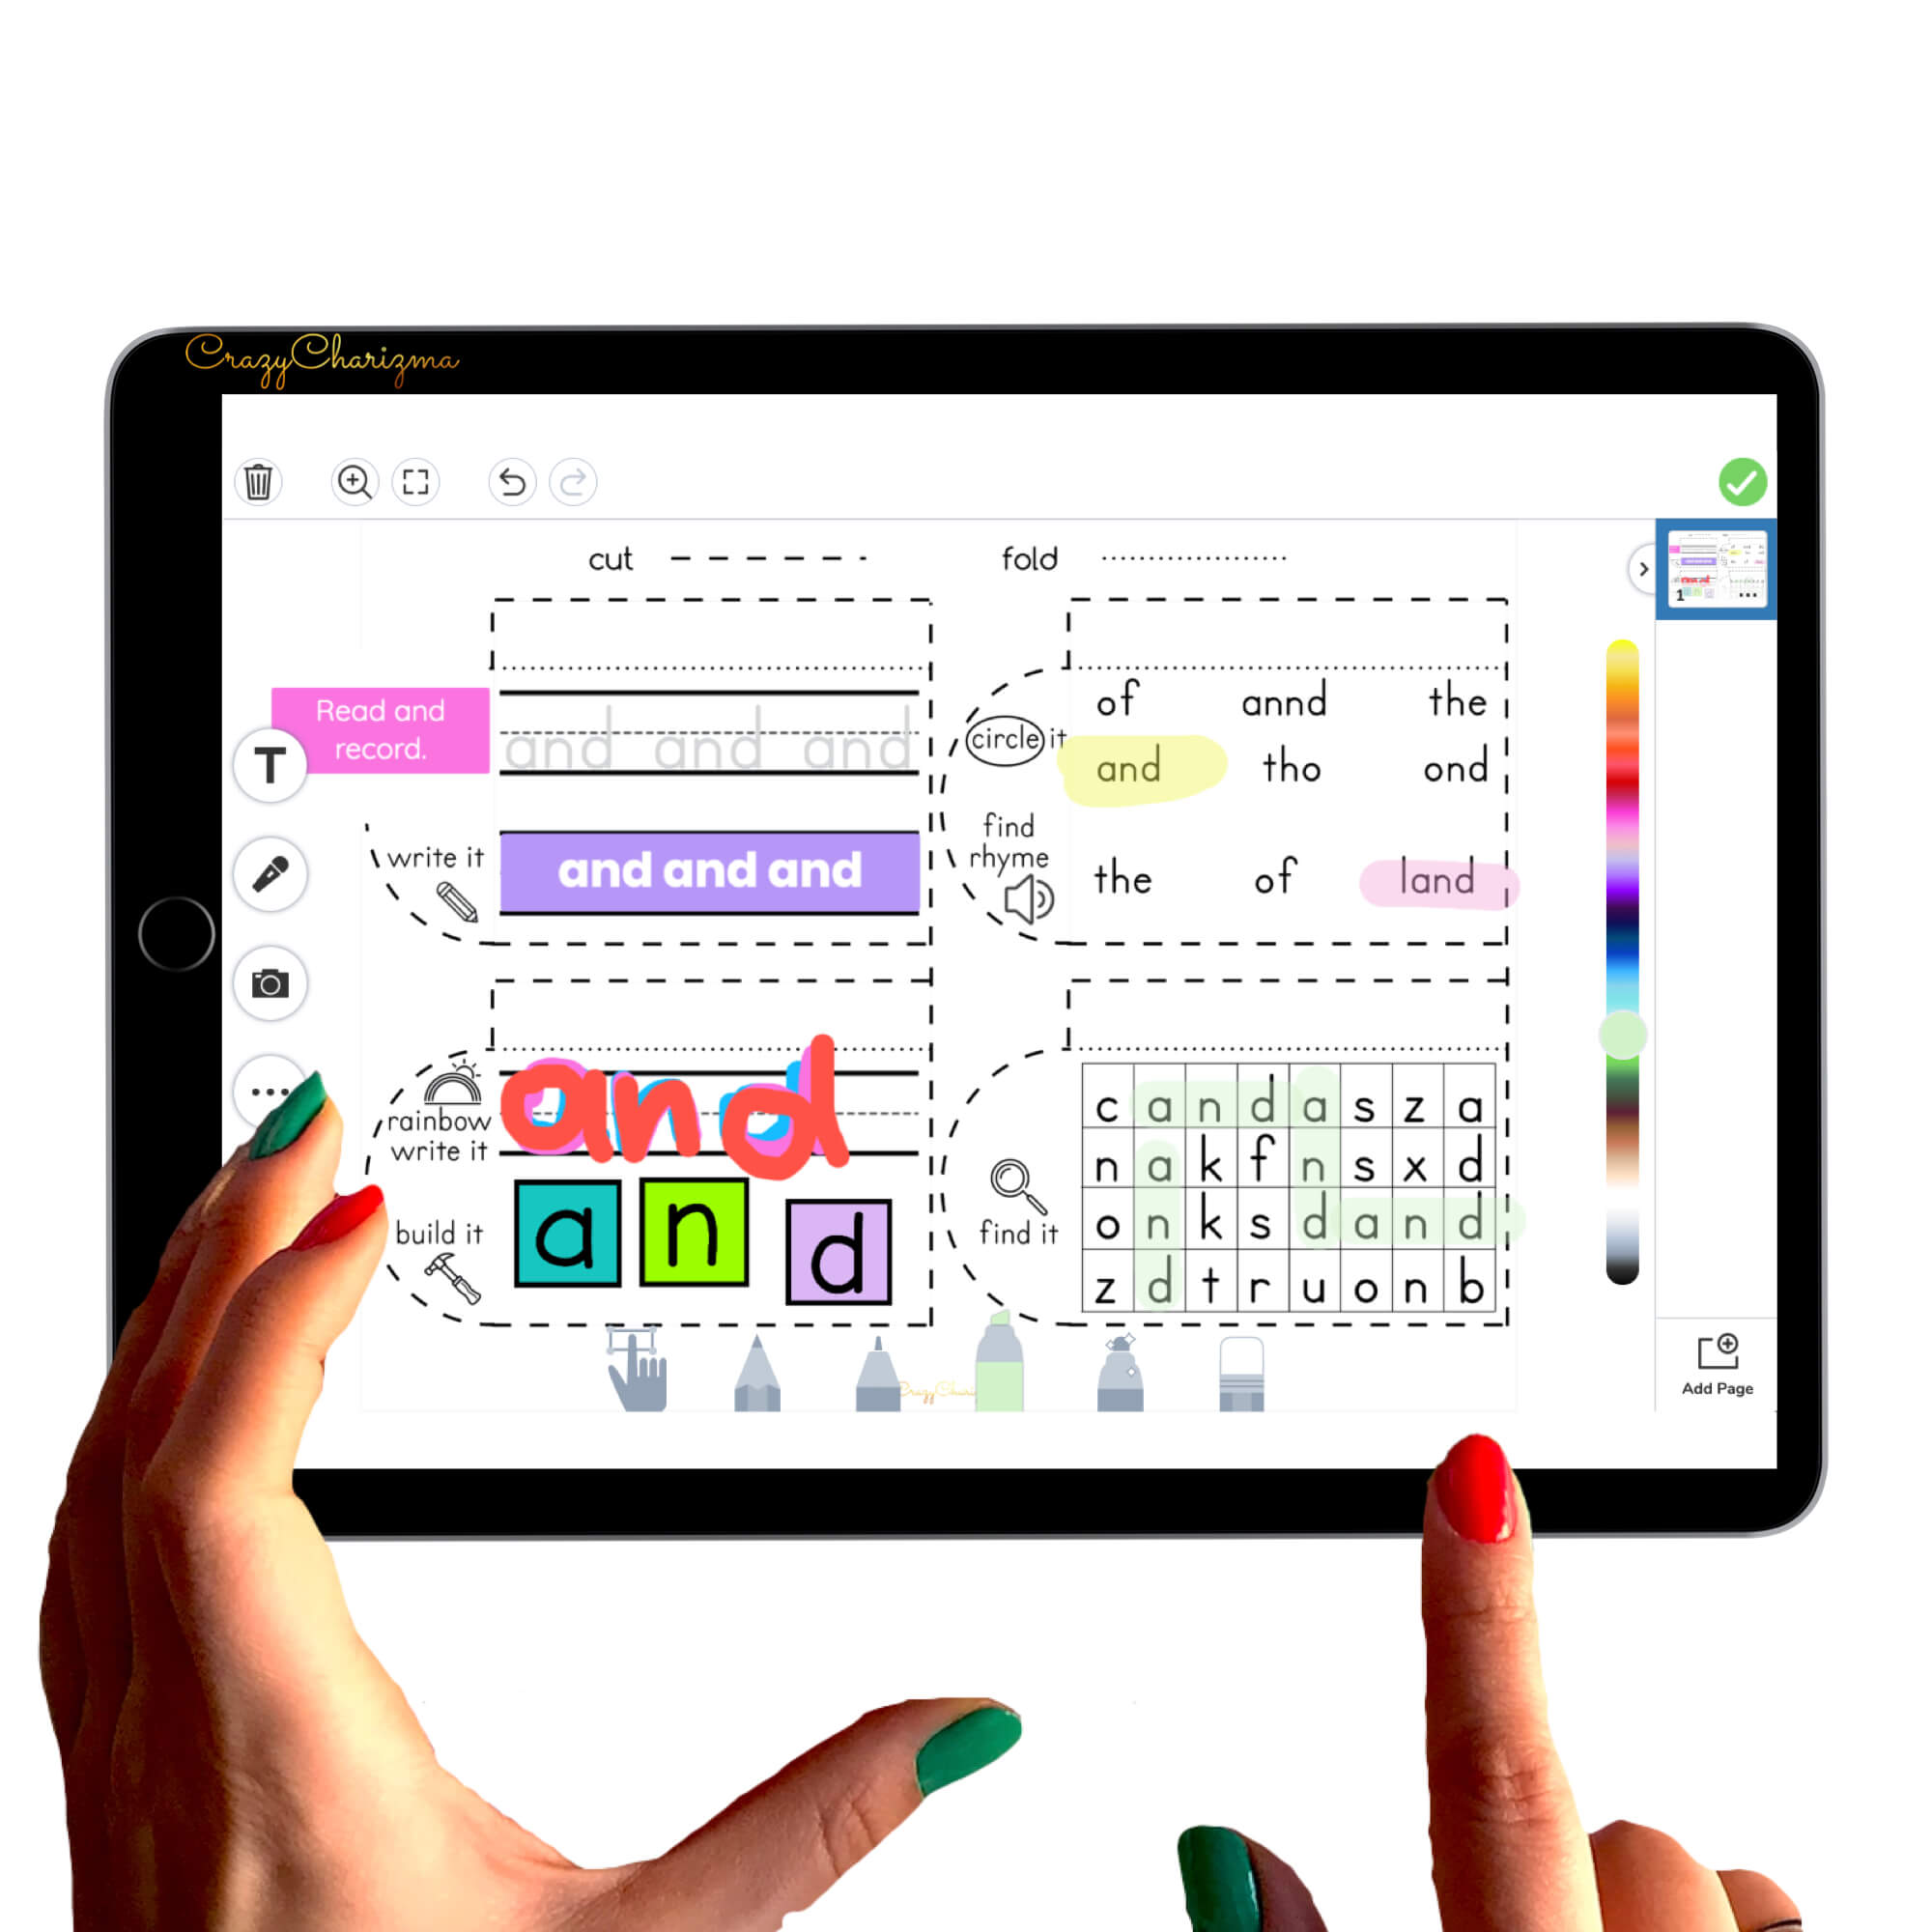
Now you have the screenshot saved as a background (page) in Seesaw. Let's make it interactive (drag and drop activity).
How to make the file interactive in Seesaw
- "Delete" unnecessary text on your scanned image using shapes in Seesaw (click on 3 dots -> shapes).
- Lock the shapes you've added (click on 3 dots -> lock).
- Add instructions by choosing text or label feature. You can change its style by clicking on 3 dots (change color and fonts this way).
- Add text fields where students will type the words.
- Upload images of letters which student will move and build the word (click on camera -> upload). Use the images you've created yourself or find them on the internet. Don't forget to check if you can use this image in your activity by reading Terms of use.
- For the task "Circle the word" your students can insert shapes in Seesaw (click on 3 dots -> shapes). Kids can also highlight the word by using the highlighter in Seesaw.
I hope, this blogpost is helpful for you and you can follow the steps mentioned and upload pdfs to Seesaw right away!
Please, spread the love. Pin this or share.
You may also like